Find Image
The FindImage plugin is used to download and display images from image catalogs for known coordinates. It uses the FIND Channel viewer to show the images found. It is usually used in conjunction with the Target List, Instrument FOV and/or Telescope Position plugins.
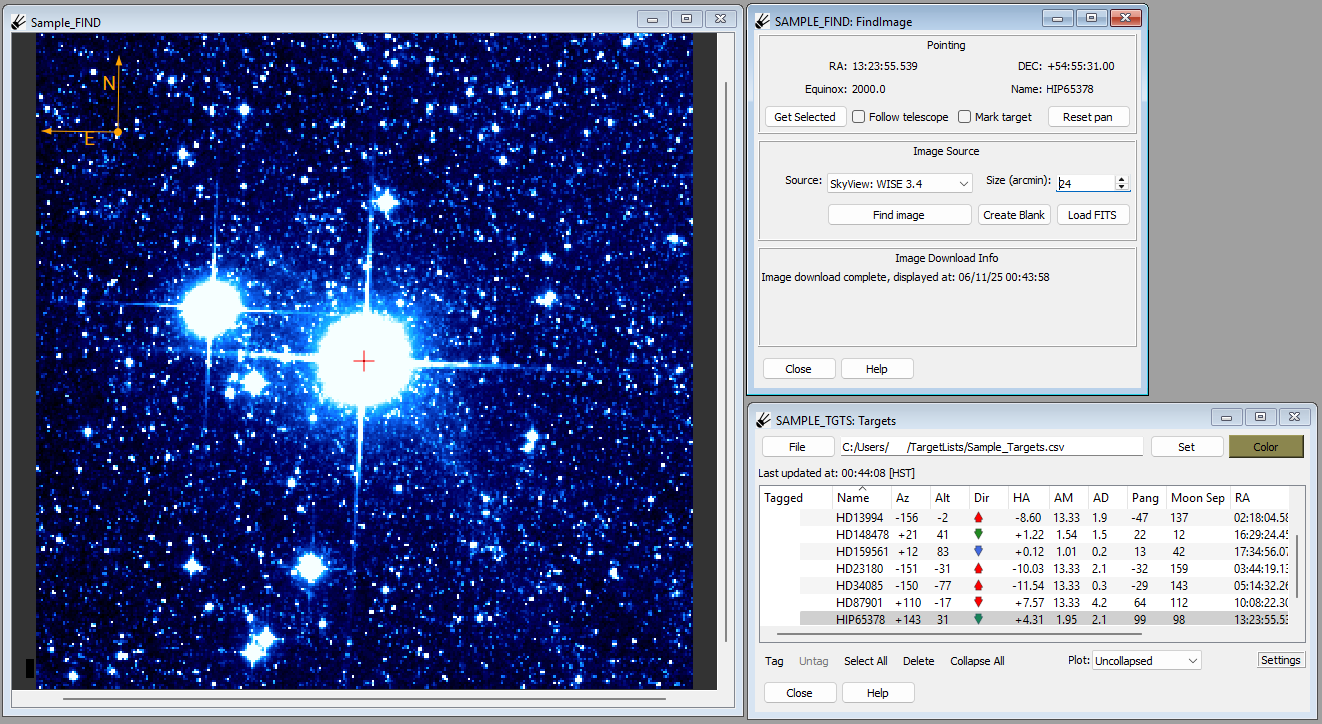
Image contains data from the WISE 3.4 \(\mu\)m survey. (Wright et al (2010), Mainzer et al (2011))
Selecting a Target
In the Target List plugin, select a single target to uniquely select it. Then click the “Get Selected” button in the “Pointing” area of FindImage. This should populate the “RA”, “DEC”, “Equinox” and “Name” fields.
Note
If you have working telescope status integration, you can click the “Follow telescope” checkbox to have the “Pointing” area updated by the telescope’s actual position. The image in the finding viewer will be panned according to the telescope’s current position, allowing you to follow a dithering pattern (for example).
Note
The “Mark target” option will circle and label the target.
Loading an image from an image source
Once RA/DEC coordinates are displayed in the “Pointing” area, an image can be downloaded using the controls in the “Image Source” area. Choose an image source from the drop-down control labeled “Source”, select a size (in arcminutes) using the “Size” control and click the “Find Image” button. It may take a little while for the image to be downloaded and displayed in the finder viewer.
Note
Alternatively, you can click “Create Blank” to create a blank image with a WCS set to the desired location. This may possibly be useful if an image source is not available.
Note
Images will fail to load if the pointing position is outside the surveyed regions. Details about each of the surveys including survey coverage can be found in the links below.